Customizing zsh terminals with oh-my-zsh and Starship.rs
A tutorial on how I personally configure my Linux terminals to look prettier and function better.
Published by Bobby DeLucia on
As a web developer and Linux user, I spend a lot of time in a terminal. Whether it be in a WSL2 Ubuntu terminal on Windows or a Kitty terminal on Arch Linux, the default styling for the terminals need a lot of work.
Here is how I customize my terminals!
Zed shell (zsh) and oh-my-zsh setup
Usually, Linux terminals use the default bash shell.
If you are using the bash shell, I highly recommend switching to zsh. This will allow us to use oh-my-zsh, which has many useful plugins, such as:
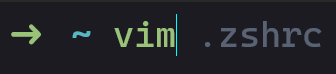
- Auto-suggestions: shows a gray suggestion after typing a command like
cdorvim:
Completions: gives a list of context-aware commands. For example, if we are typing
git stashand then hitTab: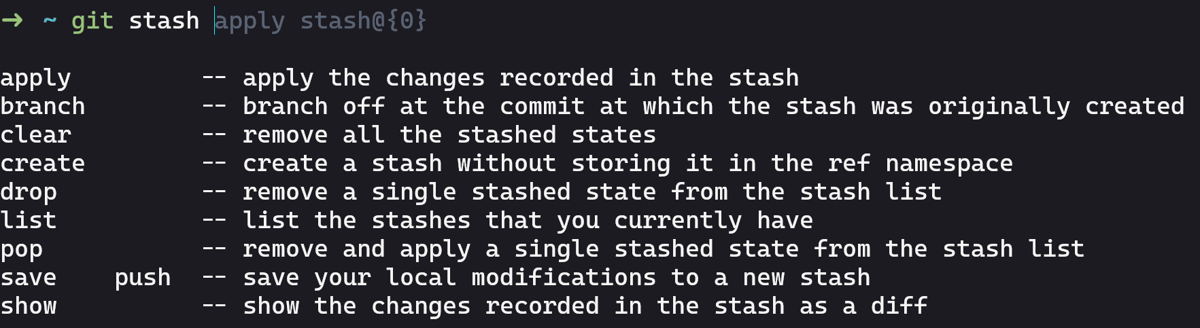
zsh completions menu for git stash options after pressing Tab We get a comprehensive list of all the options available to use!
Syntax highlighting: tells you if a command is going to run or not before you use it:
✅ Will run:

zsh syntax highlighting showing a valid command in green ❌ Won't run:

zsh syntax highlighting showing an invalid command in red
You can check what shell you are running by running this command in your terminal:
echo $0If it says bash, then you need to install zsh! Since 99% of people use Ubuntu, here are the steps for switch to the Zed shell with Ubuntu.
Switching to zsh
- Install the base shell:
sudo apt update
sudo apt install zsh- Verify it was installed:
zsh --version- Change shells with
chsh:
chsh -s $(which zsh)Restart your terminal and open a new window.
It will ask you to configure
.zshrc, just pressqto close out of it.oh-my-zshwill create this file.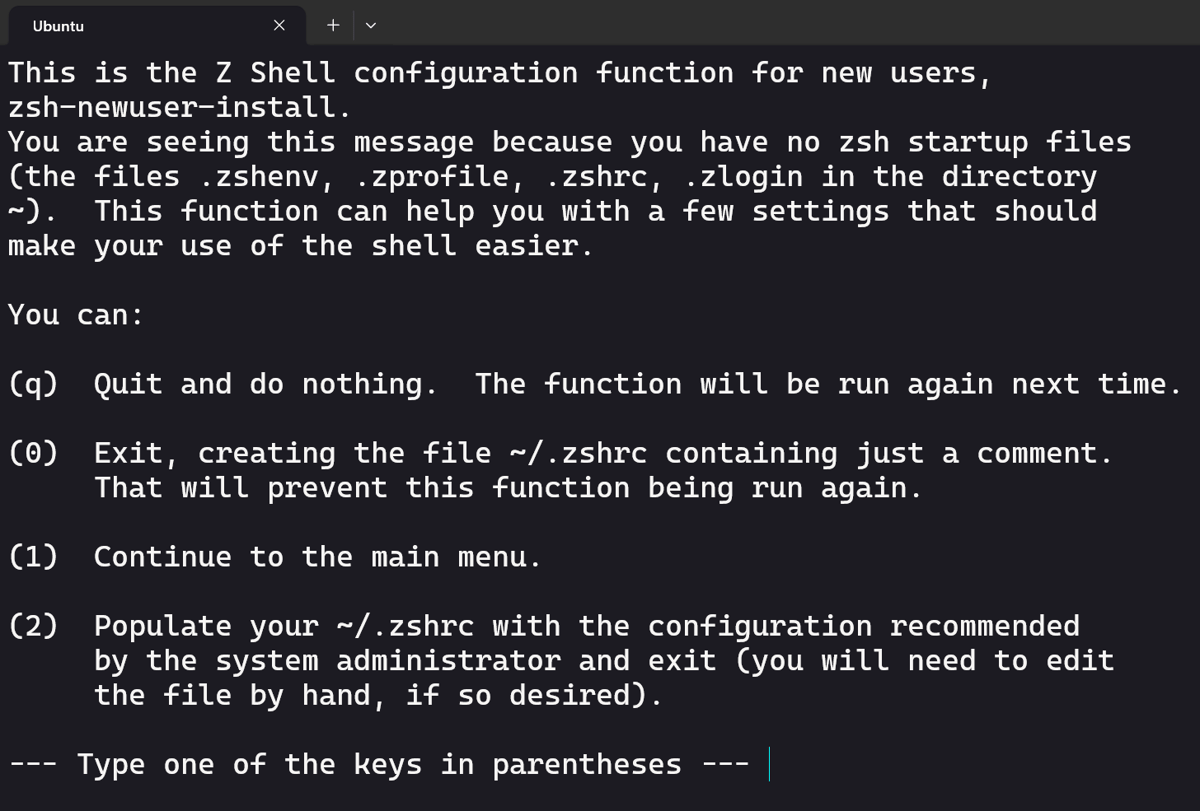
Terminal prompt asking to configure a new .zshrc file
Installing oh-my-zsh + plugins
Now to truly unlock the power of zsh, we will install oh-my-zsh and add some sensible plugins.
- Install
oh-my-zsh:
sh -c "$(curl -fsSL https://raw.githubusercontent.com/ohmyzsh/ohmyzsh/master/tools/install.sh)"You should notice the terminal got a little fancy after doing that!

- Install some plugins!
zsh-autosuggestions:
git clone https://github.com/zsh-users/zsh-autosuggestions ${ZSH_CUSTOM:-~/.oh-my-zsh/custom}/plugins/zsh-autosuggestionszsh-syntax-highlighting:
git clone https://github.com/zsh-users/zsh-syntax-highlighting.git ${ZSH_CUSTOM:-~/.oh-my-zsh/custom}/plugins/zsh-syntax-highlightingzsh-completions:
git clone https://github.com/zsh-users/zsh-completions ${ZSH_CUSTOM:-${ZSH:-~/.oh-my-zsh}/custom}/plugins/zsh-completionsTo get
zsh-completionsto work, you will have to add this line before exportZSH="$HOME/.oh-my-zsh"in your.zshrcfile:
fpath+=${ZSH_CUSTOM:-${ZSH:-~/.oh-my-zsh}/custom}/plugins/zsh-completions/srcShould look like this:
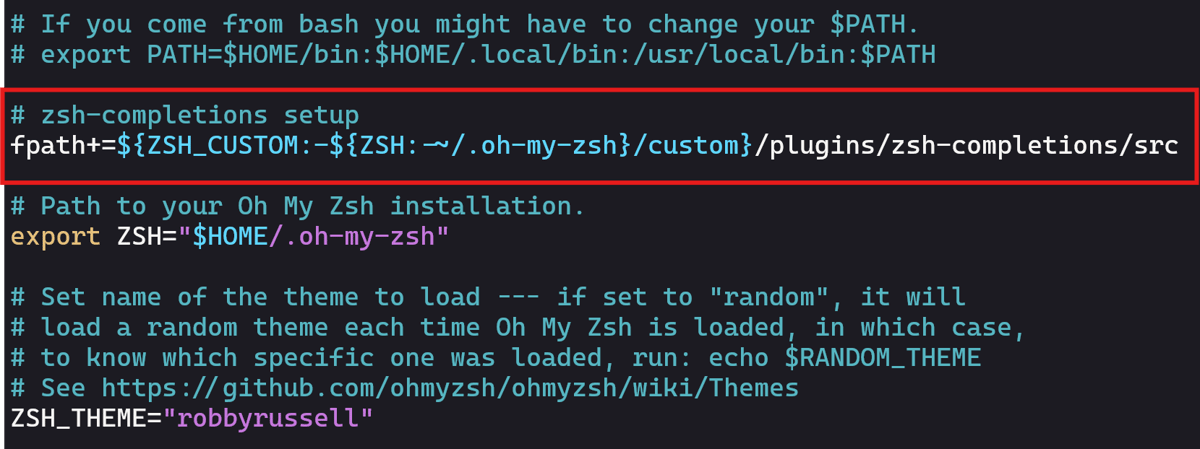
- Now all we have to do is enable the plugins!
In.zshrc, at the bottom of the file you will see a plugins=(git). Replace that with this:
plugins=(git zsh-autosuggestions zsh-completions zsh-syntax-highlighting) Save the file.
You will have to delete the old completions cache, you will have to delete that so oh-my-zsh doesn't get confused. We also have to apply the .zshrc changes. Here's how to do it in one command:
rm -f ~/.zcompdump; compinit; source ~/.zshrcYou should now notice the plugins working!
Styling with Starship.rs
Starship.rs is how we are going to style our terminal.
Starship technically works on any terminal, even Powershell (🤮powerSMELL am I right??). But for this tutorial, we are going to be installing it on WSL2 Ubuntu.
Enabling a Nerd Font in your terminal
- First, download a Nerd Font of your choosing from the Nerd Font website. Personally, I use the CaskaydiaCove Nerd Font. Make sure to install the font on your computer after downloading, I usually download the Regular and Regular Mono variants and that's pretty much it.
- Enable the font in your terminal. This is easy in WSL2 Ubuntu:
Hit the downwards chevron next to the new tab button, and click Settings.
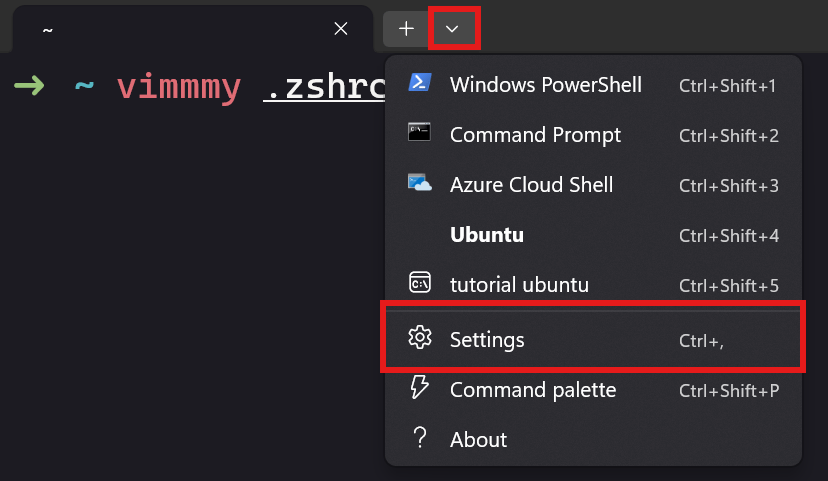
Windows Terminal settings menu opened from the tab chevron Then go to: Ubuntu > Appearance
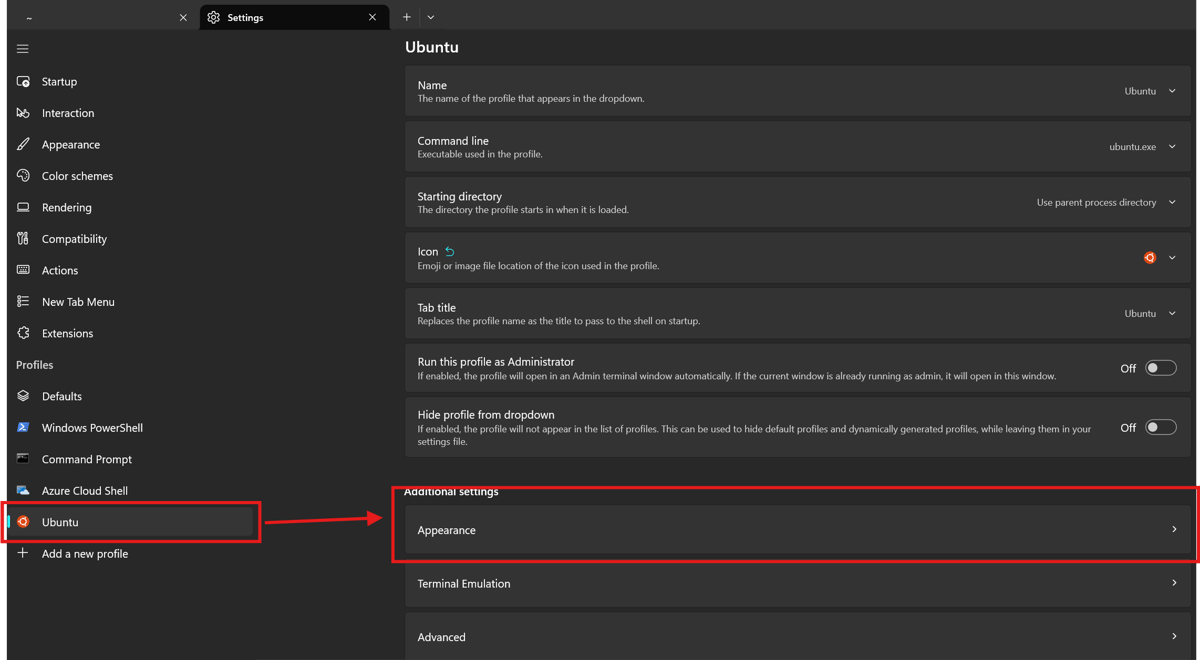
Windows Terminal Ubuntu Appearance settings panel Set the font to your Nerd Font, then hit Save.
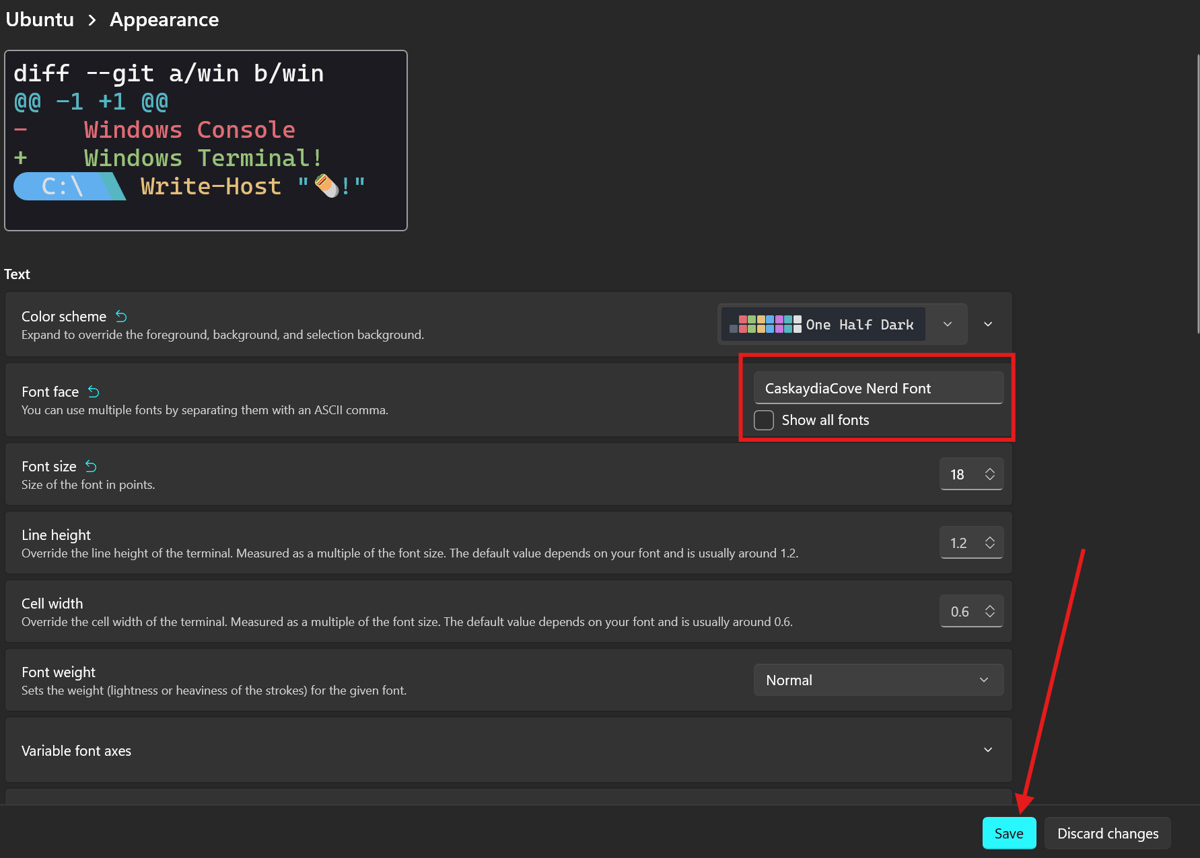
Windows Terminal font picker set to CaskaydiaCove Nerd Font
Installing Starship.rs
- Run this command:
curl -sS https://starship.rs/install.sh | sh- SInce we have
zsh, we will add this line to the end of our.zshrcfile:
eval "$(starship init zsh)"Should look something like this:
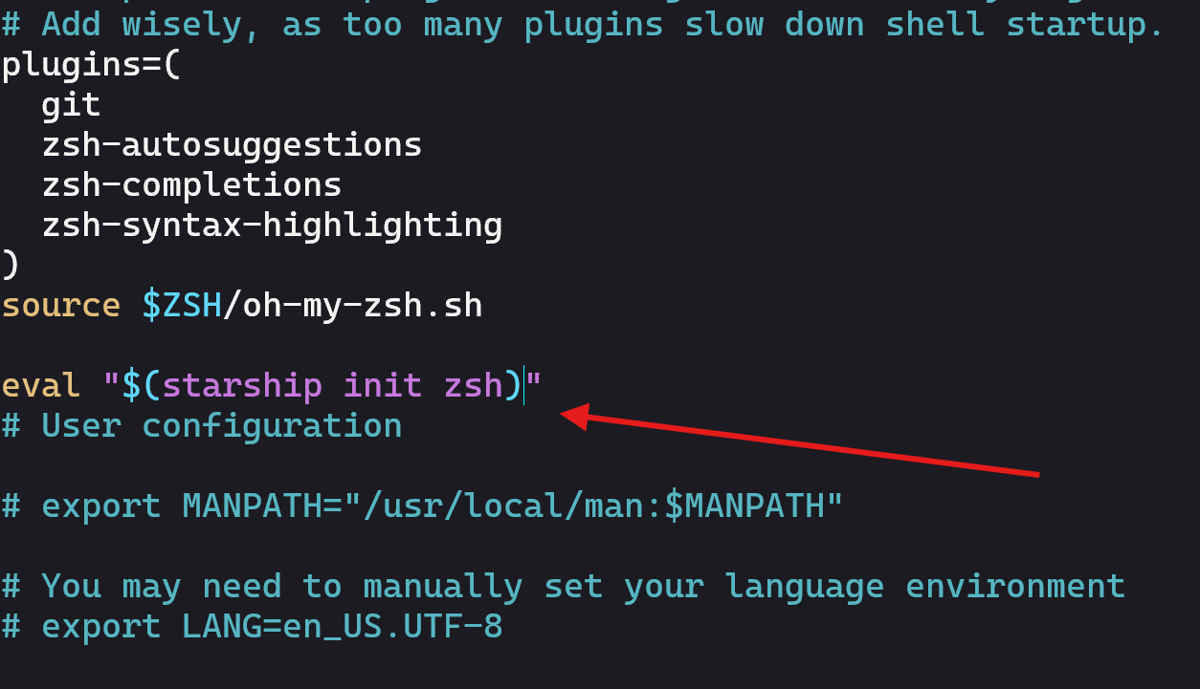
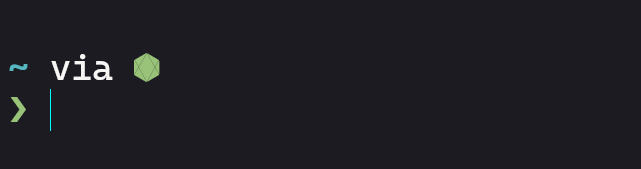
Now open up a new terminal, and you should see Starship's default styling applied!
Configuring Starship.rs
- If you are starting out fresh, you probably don't have a .config directory. You will have to make it:
mkdir -p ~/.config- Now make a
starship.tomlfile inside the.configdirectory:
touch ~/.config/starship.toml- This is where we will put our config! You can find many starting configs online, or you can start with using mine. Once you
starship.tomlconfigured, save the file, you should see the styling immediately!

(Optional) Making Vim better with Neovim & NvChad
If you used Vim for any amount of time, you probably came to this conclusion:
It sucks.
And honestly, even Vim users wouldn't blame you.
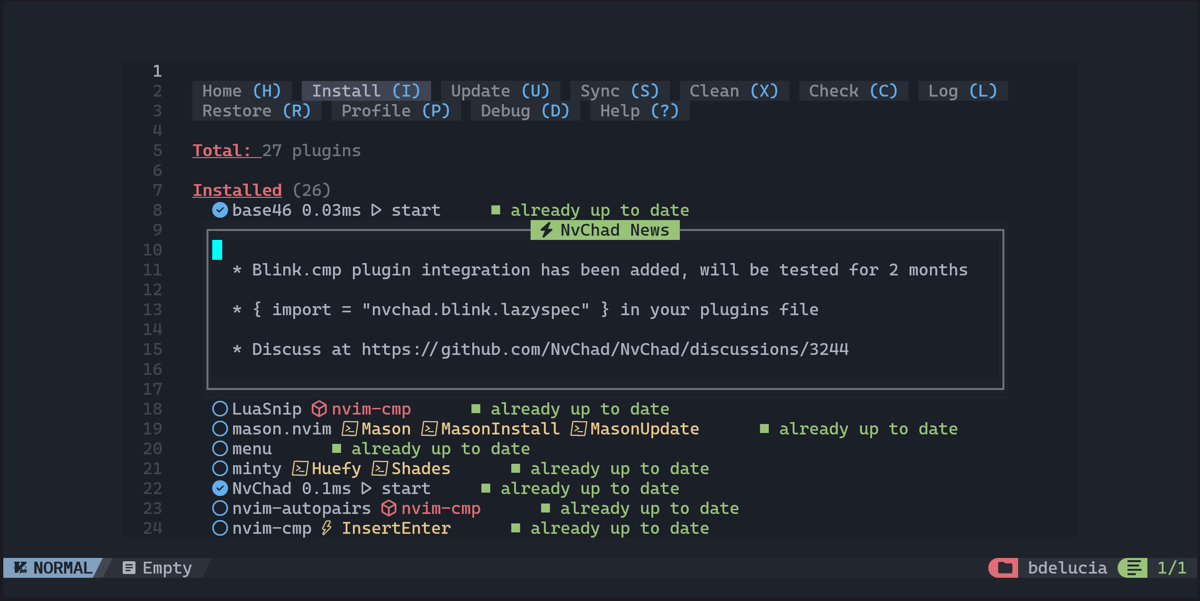
But what if I told you we could make Vim look like this? 👇
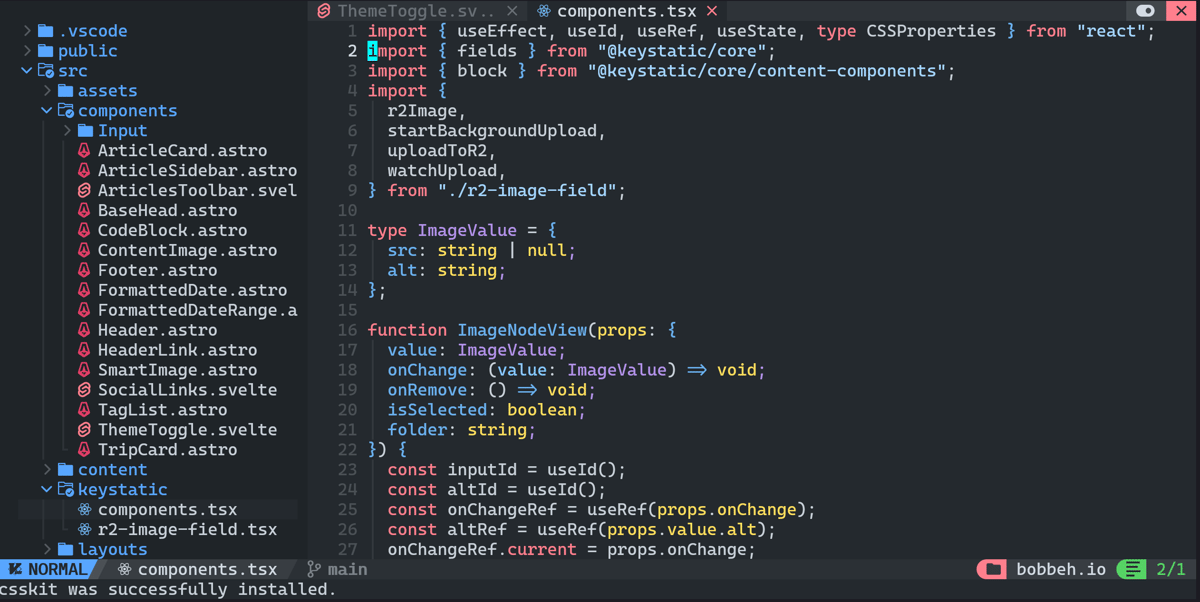
What makes it look pretty is a Neovim config called NvChad. Since Neovim is a prerequisite for NvChad, lets install that first!
Installing and using Neovim
- The first step to using Neovim is to install it. Who knew?? Use your package manager to install it, here are the commands for Ubuntu:
sudo add-apt-repository ppa:neovim-ppa/stable
sudo apt update
sudo apt install neovim- Usually, I alias
vimto runnvim. This way, when you type something like:vim .zshrc, it will open it in Neovim. This is completely optional. But, if you want to do it, add this line to the end of your.zshrcfile:
alias vim='nvim'- It's also helpful to change the EDITOR and VISUAL environment variables so if programs open up a text editor by themselves, it will open up Neovim instead of Vim. To do that, also add these lines to your
.zshrcfile:
export EDITOR='nvim'
export VISUAL='nvim'- Now open up a new terminal instance and type vim. You should see Neovim pop-up instead!
Making things fun with NvChad
- Run this command:
git clone https://github.com/NvChad/starter ~/.config/nvim && nvimThis will open up nvim, it should look like this when done:
- Don't close out just yet! Type
:MasonInstallAlland then:TSInstallAll - Then you are pretty much done! Here are a few NvChad keybinds:
Spacebar- Opens up the hint windowSpacebar + e- Opens up the nvimtree window. You can close it withSpacebar + xSpacebar + t + h- Opens up the theme picker. You can see all the themes NvChad has by default here.Spacebar + c + h- Opens up a Neovim keybind cheatsheet.Spacebar + r + n- Toggles relative line numbers.
NvChad has a ton more features, check them all out here.
(Optional) Adding startup programs to your terminal
Many people add programs like neofetch and pokemon-colorscripts to their terminals, so every time they open a new terminal, the program runs!
Example of neofetch running on startup:
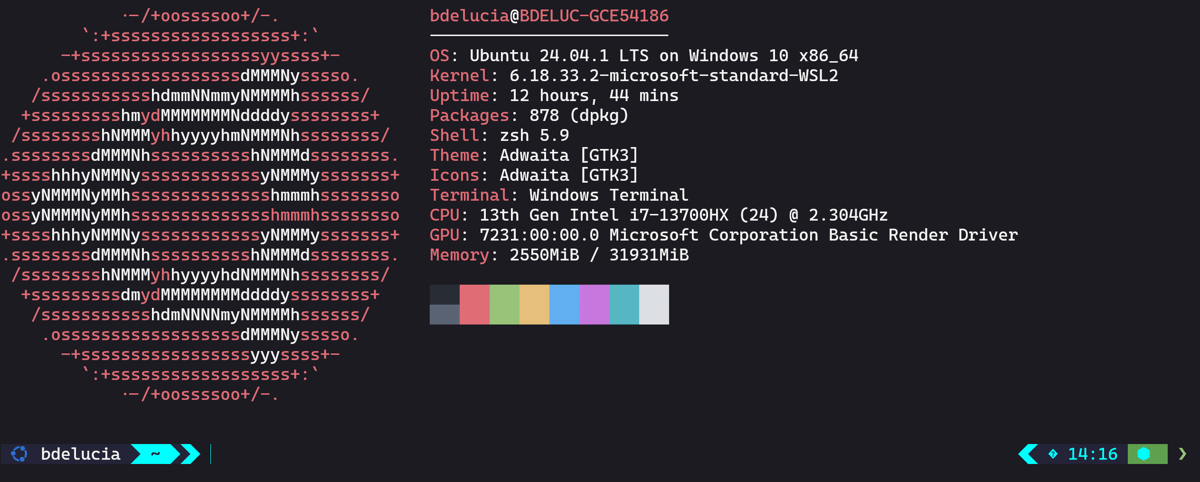
All you have to do is download the program you want to run and display, and add it to the end of your .zshrc file. Here's the full process for both!
💡 PRO LINUX POWER USER TIP: You can use this line to instantly append lines to the end of your
.zshrcfile without having to open it in a text editor:
echo "{your command here}" >> ~/.zshrcneofetch
- Install neofetch with your package manager. For Ubuntu, the command would be:
sudo apt install neofetch- Open up
.zshrc, and write neofetch at the end of the file:
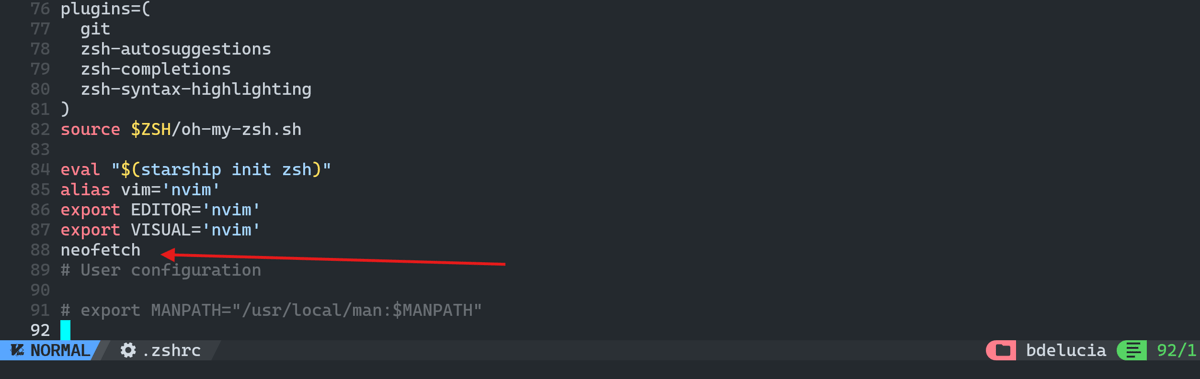
- Open up a new terminal. Bam!
pokemon-colorscripts
- Install
pokemon-colorscriptsby first cloning the repo...
git clone https://gitlab.com/phoneybadger/pokemon-colorscripts.git- ...going into the directory...
cd pokemon-colorscripts- ...and running the install script.
sudo ./install.sh- Now you can use the
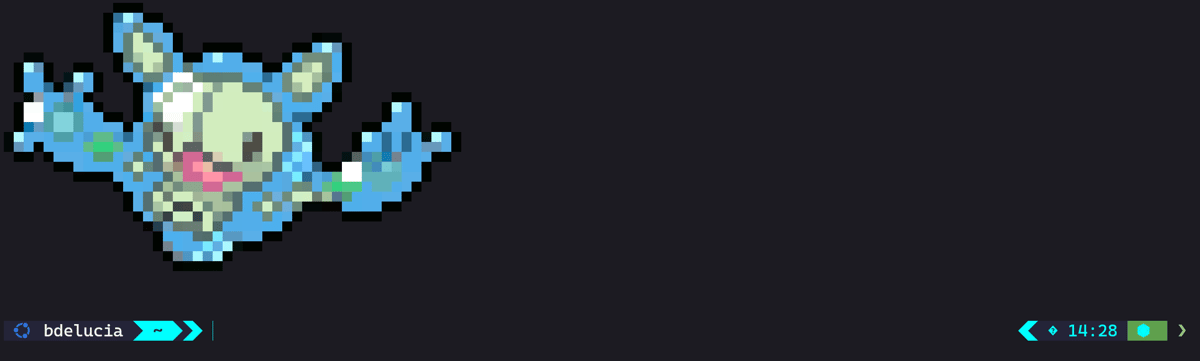
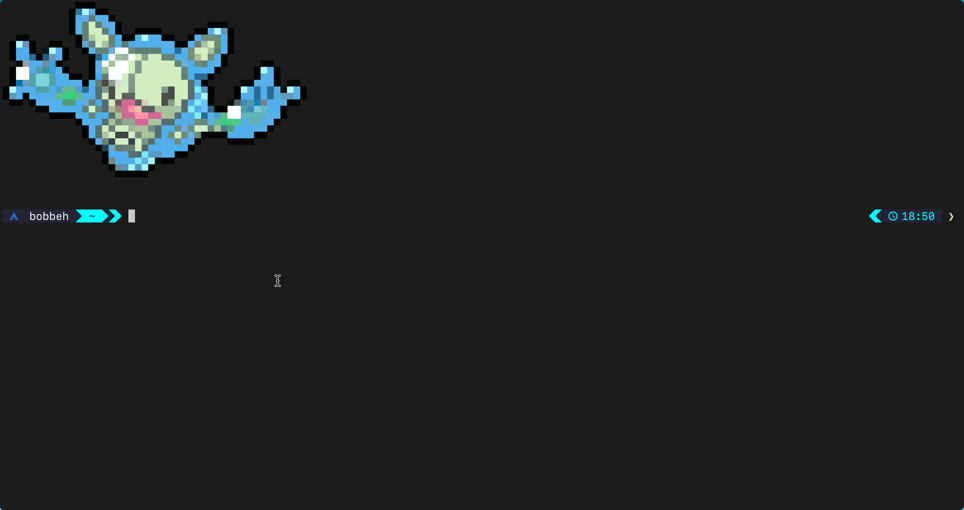
pokemon-colorscriptsprogram. Go here to see how to use it to display any set of Pokemon you'd like, or ask an LLM to generate the line for you if you are lazy. In my example, I will be displaying a shiny Reuniclus (my favorite Pokemon) with no title. The exact command for that is:
pokemon-colorscripts -n reuniclus -s --no-titleAdding that line to the end of my .zshrc file:
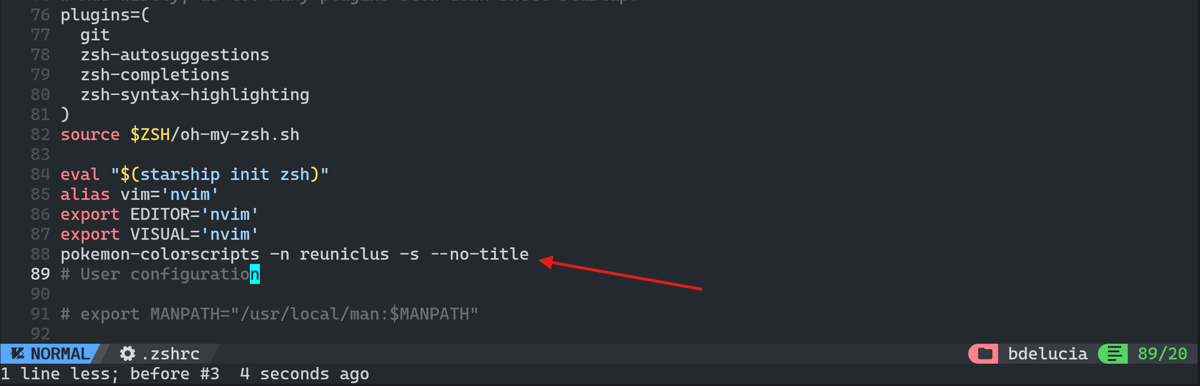
Now opening a new terminal, we see him!